Sign up for the Family Tree Newsletter Plus, you’ll receive our 10 Essential Genealogy Research Forms PDF as a special thank you!
Get Your Free Genealogy Forms
"*" indicates required fields
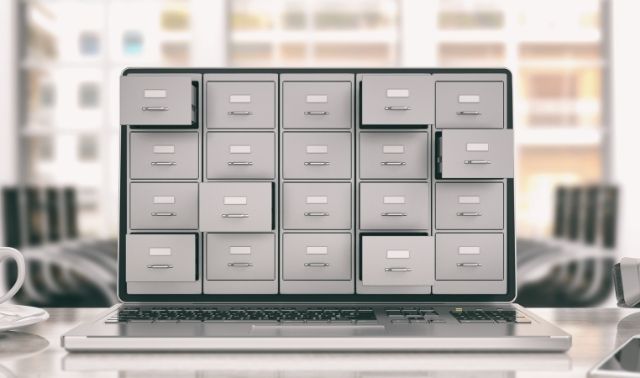
A lot of businesses these days are “going paperless,” or keeping records electronically. Why make that transition? Electronic records don’t take up much space. Data can be secured electronically and retrieved remotely by multiple sources. Changes can be recorded instantly (and legibly—ever tried reading a doctor’s scrawl?). Less paper waste is generated. Nobody spends hours refiling.
You can enjoy the same advantages when you take your family history research paperless. You can give yourself access to documents and photos from a library, a relative’s house, or even your own workplace (only during lunch break, of course). All without disturbing fragile originals, churning through file cabinets or hauling around tote bags stuffed with papers, albums and binders.
Going paperless does require some investment in time and technology. It involves a shift in the way you think about storing and retrieving information. But scan these genealogy scanning tips from several expert sources, and you may find yourself more ready—and willing—than you thought to make the leap.
1. Decide What to Scan First
“Start by digitizing the things that are most valuable and irreplaceable,” says Hannah Allan, a family historian and reference librarian at the Oregon Historical Society. Things you can’t get another copy of, like the only known photo of your ancestor and original documents. It’s tempting to start with copies of official documents, but [most of the time] you could get more copies if you had to.”
After archiving important papers, Denise May Levenick of the Family Curator blog takes a “start date” approach.
“You don’t have to convert 30 years of paper documents to digital files before you can begin to use electronic file management,” she writes in her book How to Archive Family Keepsakes (Family Tree Books). She recommends choosing a date to start digitizing all new information. “Your old files can remain paper until you are ready to digitize them (and if that day never comes, that’s OK).”
2. Pick an Image Resolution
An important measure of scan quality is resolution, measured as the number of digital dots per inch (dpi) into which the original image is rendered. Choose the right resolution before you start so you don’t waste time and money.

For most documents, 300 dpi is sufficient. But scan photos at 600 dpi. This allows you the flexibility to zoom in on one person in a group portrait, enlarge some hard-to-read text, and print enlargements for display. Levenick scans at 1,200 dpi when she’s planning to print an enlargement or do detailed retouching. Just remember: Higher-resolution scans take longer, require pricier equipment and more storage space, but don’t yield a noticeable difference when printed at the same size.
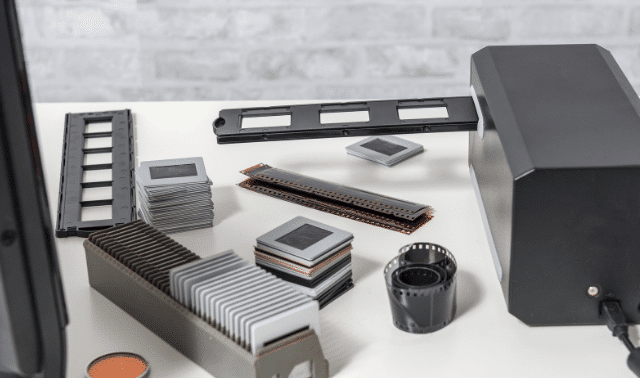
For a higher-quality result, scan negatives or slides instead of prints if you can. You’ll use a high resolution for negatives—at least 2,400 to 3,200 dpi—advises Levenick. If you scan at 4,800 dpi, you’ll be able to print decent images up to 16×20 inches.
3. Choose a File Format
Most genealogists use TIFF and/or JPG formats for photos and PDF for documents. “A TIFF is larger but preserves better; a JPG is more for sharing and emailing,” explains Allan. Best practice: Create a TIFF file for archiving your most valuable scans. This high-quality image doesn’t experience loss when you resave it. JPGs are smaller and easier to work with. “It’s nice to have JPGs of things you look at constantly, but it deteriorates every time you save the file.”
“In some situations, you won’t have a choice, such as with a lot of cameras or mobile devices,” says Chad Osten, a family historian with expertise in both Macs and PCs who blogs at MacGenealogy. “You will probably end up with a JPG. This is not a bad thing with documents, as long as they are very readable.” He still advises using TIFFs whenever possible.
If you want both quality and flexibility, consider starting with a TIFF file, which you’ll keep as your digital master. Save a copy as a JPG for everyday use.
Try to save scans of documents as PDFs. Then you’ll be able to keyword-search most text (except old handwritten script), which a photo format can’t do. Also, PDFs will create multipage files. “This is great if you have longer documents, like a diary or a pension application,” Allan points out. “It’s annoying to work with each page as a separate JPG.”
4. Select the Right Tools
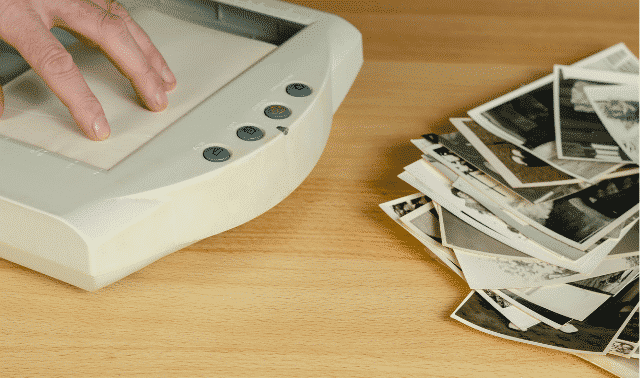
All-in-one printer/copier/fax/scanners can be great for genealogy, but they don’t always perform quickly or on the go like a portable flatbed scanner does. Of course, you don’t always have (or want to have) a portable flatbed with you, either.
“The cameras in mobile phones (Android, iPhone 4 and above) and tablets (iPad 3 and 4 and Android) have gotten quite good and can work as a mobile scanning solution,” says Osten. “There is a lot of dedicated scanning software for mobile devices.” He recommends shifting the way you think: The camera on your phone or tablet is your in-a-pinch scanner. Load it with an app such as Scanner Pro for the iPhone and iPad (learn more at Readdle.com), which will upload your images to Evernote note-taking software; Dropbox, a file-sharing and online backup service; and Google Drive.
You’ll still want to have a scanner available, though. “The dedicated scanners you find under $200 are actually very good,” says Osten. Look for a model that scans to the resolution and file types you want. Most scanners come with at least basic software for color and tilt correction, red-eye removal, cropping, digital dust removal, image brightening and/or photo-stitching for oversize images. Sometimes that accompanying software isn’t so good, so you might want to upgrade. Osten uses scanning software called VueScan and edits with Adobe Photoshop.
Some scanners come with attachments for negatives or slides. Osten warns that lower-end models may lack good software or may only work with 35mm film. If you like top-quality scans but not the $599 price tag on a higher-end model such as the Epson Perfection V700 Photo Scanner, Osten suggests paying a professional service to scan your film.
5. Clean and Prep Your Materials
Be sure your scanner glass is free of dust, smudges and particles. “Dust can cause spots in your scanned images,” says Mei Antonio, a representative of scanner manufacturer Epson. “If the glass surface gets dirty, clean it with a soft, dry cloth.”
For grease and other stubborn stains, “use a small amount of glass cleaner on a soft cloth, and wipe off all remaining liquid. Don’t spray glass cleaner directly on the scanner glass.” Never press forcefully on the plate or clean with abrasive fibers or chemicals.
Remove paper clips, staples, tape and such from originals if possible. Don’t clean photos with erasers. The American Institute for Conservation of Historic and Artistic Works advises that you brush soiled photographs carefully with a clean, soft brush. “Do not attempt to clean photographs with water- or solvent-based cleaners, such as window cleaner or film cleaner. Improper cleaning of photographic materials can cause serious and often irreversible damage.”
6. Start Scanning
“Close the scanner cover gently so your original doesn’t move,” says Antonio. Epson scanners handle bulky items (such as commemorative county history books) with a “high-rise, 180-degree lid” that fits over books and albums; other lidded flatbeds may have similar features.
Treat originals with care. Don’t put photos or fragile or torn documents (or one with staples or clips) through a scanner’s automatic feeder. “The more you scan something, the more it deteriorates, both because of the light exposure and handling,” warns Allan. “A super fragile book may be fraying. Flipping pages quickly may be harmful. Don’t push down on [the lid] when you scan.” Allan leaves the scanner lid open to protect bulky originals. She even advises photographing instead of scanning your most delicate items.
Finally, “scan everything in full color, even newsprint and black and white photos,” advises Levenick. “Your file size will be larger, but the color channels will capture shading and detail with greater clarity.” You can always edit a copy of the file (not the master scan) later to print in black and white or grayscale, which adds gray tones to black-and-white.
7. Note the Owner
Keep track as you go of who owns the copyright to images you gather in case you want to publish a family history project someday.
Most documents, photographs, artworks and other materials published within the past 75 years are copyright-protected. Original, unpublished works (such as a diary) are protected for 70 years after the author’s death. Protected works require the permission of the copyright holder (the original creator or his or her heir) to publish or reproduce. (Learn more about copyright law as it applies to genealogists.)
If your great-grandfather’s original diary is at an archive, you need the archive’s permission to reproduce it because they have physical possession of the item (and might have been granted copyright by the donor). Similarly, if you find an image of a record, tombstone or other artifact at a website, check with the administrators about permission to reprint. The item photographed might not have copyright protection, but the digital image of it may.
Even if you don’t plan to publish material found at a library or archive, ask whether you may create your own digital copies before you visit. “Repositories have the right to say no: They may want to do any copying or scanning themselves,” explains Allan. Some may allow photography; it’s more common not to allow scanners because of possible damage to items being scanned.
The Oregon Historical Society charges a flat rate of $10 per day for do-it-yourself photography. “The money goes to preserve those documents,” she explains. A flat rate charged by institutions might or might not include permission to publish. Remember to ask.
8. File as You Go
Archival file management has three major components: organization, metadata and backup. Choose a simple system and use it consistently.
Your computer likely has a default system for storing photos. You also can use photo management software such as Adobe Photoshop Lightroom, Apple Photos or Photo Director 365. But also consider storing all images (including non-photographs) with other genealogy files, subdivided by family group.
Use a consistent file-naming process for, recommends Allan. “Make sure the file name is understandable, not just a random number. I name by what it is (a letter) and the source (newspaper, date, issue). Some suggest not using spaces between words in filenames. They capitalize the first letter of each word to make it more readable: SmithFamilyPhoto.”
Her file-naming system captures some metadata, or information about the image, in the file name. But you won’t fit full citation information and descriptive notes in the file name. Enter that by right-clicking on the image. Open the Details tab and enter that information in the fields for title, subject, tags, comments, date acquired and copyright.
In a PDF, right-click to go to Document Properties, then title, author, subject and keywords fields. Or use bibliographic software such as Evernote or Zotero, which automatically captures some source data and gives fields for additional information you provide.

9. Back Up Everything
“Always back everything up, because scanning is usually a time-intensive process,” says Osten. “You never know when something will happen to a hard drive, or you may only have access to a document or photo once. There’s nothing like flying somewhere, scanning a lot of images there, getting back home and then losing them for some reason.”
Remember the LOCKSS principle: Lots of copies keeps stuff safe. “Ideally, you back them up to another hard drive and then somewhere outside of your residence (online, at a relative’s house, safe deposit box),” says Osten. But he stresses that some form of quick backup is better than none. Archive your master TIFF files in multiple locations. Then, he says, at least “generate a batch of JPGs from TIFF file and upload those to an online archive or photo service, or throw them on a USB flash drive or CD/DVD and put them in a safe deposit box.”
10. Be Smart
You’ll save a lot of time and money if you think flexibly. “Let go of the notion that everything needs to be digitized to the same standards,” advises Levenick. “The 19th-century photograph of your great-grandmother is a family archive document that deserves the time and patience required for a high-quality image from your flatbed scanner. Your handwritten research notes for last month’s genealogy workshop will be easily read from a photo snapped with your cell phone camera.”
Go back to your first step: prioritizing your efforts. Get what’s most important into digital (and duplicate) form. As you invest time and funds in scanning these items, you’ll become more skilled at it. You’ll also discover the joys of an emptier desk, lower printing and paper expenses and immediate access to those all-important images.
A version of this article appeared in the September 2013 issue of Family Tree Magazine.
Last updated, October 2023
ADVERTISEMENT