Sign up for the Family Tree Newsletter Plus, you’ll receive our 10 Essential Genealogy Research Forms PDF as a special thank you!
Get Your Free Genealogy Forms
"*" indicates required fields

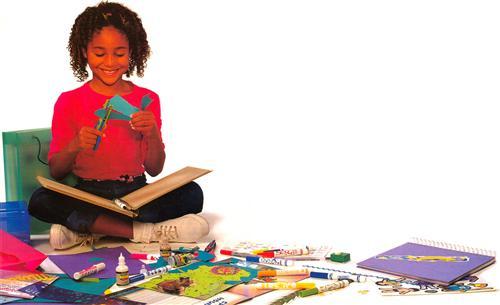
You won’t find “scrapbooking” in Webster’s Dictionary — yet — but you can’t miss it in America’s hobby and craft stores. Scrapbooks, “memory albums” and “heritage albums” are the hottest thing since the invention of scissors. One in five US families has started scrapbooking, according to the Hobby Industry Association.
I’ll admit that I was skeptical about preserving my photographs and memorabilia in scrapbooks. After all, I remember creating memory books in those magnetic albums back in high school — and I know what happened to that material. Those memories are in various stages of deterioration and no longer pretty to look at.
But today’s scrapbooks are very different. In response to the preservation concerns of the hobbyists who spent close to $300 million last year on scrapbooking equipment and supplies, manufacturers have developed products that meet stringent preservation standards. The result: You can create durable and safe scrapbooks to document your family history, albums that will preserve your memories for future generations and future genealogists. This doesn’t mean scrapbook products can be used indiscriminately, but rather that safe, smart supplies exist if you know what to buy and where to look for them.
The golden rule of creating a safe scrap-book is to not cause irreversible damage to your photographs and artifacts. In other words, make sure that whatever you do can be undone.
Heritage albums that document family history are a great way to share your genealogical knowledge, even with relatives who claim not to be interested in the subject. By following some simple guidelines you can create an album that’s colorful and attractive — and that will stand the test of time. Follow these eight steps to get started scrapbooking safely:
1. Carefully select which items to include. Genealogical research is a process of acquiring information, documents and photographs. When faced with boxes and notebooks full of genealogical materials, deciding what to include in your heritage album can be a daunting task. Before embarking on a scrapbook you must first decide on a theme for your book. Your theme can be as specific as a single event or as broad as a family.
Set up a clean work area that you can use to lay out your materials, store supplies and create your scrapbook. Be sure to wash your hands and wear clean cotton gloves before handling the items you select for your album so that you won’t leave fingerprints on the pictures.
2. Choose albums and papers that are lignin- and acid-free. If you leave a newspaper in the sun for an afternoon, you’ll see how fast paper yellows even in a short exposure to heat and light. The lignin in the paper causes the yellowing. Lignin is a natural substance found in trees and plants. Since most paper is made from wood pulp it contains lignin. During the process of creating the paper from wood, acid is added to break down the chips into pulp. This acid will eventually migrate to your pictures and cause staining. So it’s important to find albums and paper that are lignin-and acid-free. Thankfully, this is no longer difficult. Library suppliers and scrapbook companies now carry full lines of paper that are advertised as lignin-and acid-free.
Unfortunately, not all advertising can be trusted. Unless preservationists approve the paper and album, it’s best to check the acid content yourself using a pH pen (see suppliers, next page). Draw a line on the paper using the pH pen. If the line turns purple, the paper is acid-free and safe to use. Any other color is an indication that acid is present. On darker-colored paper use a pH testing strip dampened with distilled water, then touched to the paper.
One final caution about paper: Before using dark-colored paper, even when you’re sure it’s acid-free, make sure the color won’t run when exposed to water. If exposed to high humidity these paper colors may bleed and destroy your photographs.
3. Never use original photographs. Why use original photographs and risk destroying them when you can make copies? Most scrapbook magazines and books show you how to crop and layout your images with stickers and cutouts. That’s fine as long as you don’t use your grandmother’s original wedding picture or special family photos. One wrong move with the scissors and you’ve destroyed the irreplaceable. Cropping and using cutouts can also interfere with identification by obscuring parts of the image.
There are copy options that you can do yourself. Gone are the days of taking your original image to a photographer or using a copy stand. Scanners and computers have changed all that. For instance, if you own a scanner you can digitize the images and then print them on high-quality photo paper. Or you can go to a photo store, drugstore or other retailer that has a self-operated Picture Maker kiosk from Kodak. It allows you to crop, enlarge, reduce red eye and even add creative borders to your pictures. This method is too expensive to use for all your images, but it’s perfect for a select few.
Film developing offers many opportunities for extra prints. When you take film to be developed you can request extra prints, selectively choose pictures from a Web site or have them placed on a CD-ROM. In this way you can experiment with duplicate prints without harming the original. You can place one in storage and the other in an album.
Including documents and clippings in your scrapbook adds another dimension to the story you’re trying to tell. But since the paper is acidic you want to be careful the documents and clippings don’t come into contact with your images. Preservationists recommend de-acidification before placing papers in scrap-books. Seek the advice of an expert before attempting to use any of the de-acidification sprays now on the market or immersing the documents in a special solution. You can also make copies on acid-free and lignin-free papers and use those instead.
4. Make sure all inks are waterproof and label everything. Remember that the purpose of your scrapbook is to tell a story, so try to label all the pictures you include. Write information underneath or alongside your pictures, never on the photo itself. You can use a soft graphite pencil on the back while the image is face-down on a hard clean surface, but never use anything on the picture area. It doesn’t matter that you’re using copies — you still want this scrapbook to last. It’s a family artifact. You created it and it will have a place in your family’s history.
Use only a scrapbook-safe pen to write on your pages. In your genealogy work you’ve probably seen census pages or other documents where the ink ran because of water damage or even just high humidity. Don’t let that happen to your scrapbook writing! You can test the solubility of the ink by writing on a piece of paper and submersing it in water; if it runs, don’t use it.
A truly safe pen for scrapbooks is one that passes the non-toxicity standards of the Arts and Creative Materials Institute. It should be waterproof, fade-resistant, permanent, odorless (when dry) and quick drying. Don’t worry about the smell of the ink when wet; pens that dry rapidly often contain alcohol that dissipates when dry. Most of the pens commonly available in stationery stores such as ball points, roller-balls and markers do not meet scrapbook-safe standards. Before purchasing a pen, try it out to at least make sure it won’t smudge or run.
In general, permanent black ink is the best choice for captioning, since colored inks can fade. Scrapbook manuals advise using color for decorative features as long as they’re scrap-book-safe. Metallic inks are not recommended.
A basic caption needs to include the name of the person (with life dates), information about the event, where the picture was taken and when. You can then add additional story details if you desire.
5. Use corners rather than adhesive.
Young women and a few young men of past generations collected photographs of family members and created the predecessors of today’s scrapbooks. They organized materials in order to tell a story; unfortunately, the techniques they used to create the albums have since caused preservation problems. The glue used to paste the images into the albums has begun to seep through the images or, in other cases, made it impossible to remove the photographs from the pages. Let’s not repeat the mistakes of past generations — it just takes a little common sense.
As a former photographic curator, I’ve seen the destructive qualities of adhesive first hand: photographs and memorabilia altered by the glue used to put them in albums. Because of that experience, I’m a purist, and tell people: Always use self-adhesive photo corners instead of glue. You can buy a wide variety of these, from clear Mylar to decorative paper corners. Clear corners should be either Mylar or polypropylene, two types of plastics that have been approved for use with images. When a manufacturer states their corners are made out of plastic you need to verify that they are one or the other. If in doubt, ask. Paper corners should be acid- and lignin-free and pass the pH test. Photo corners use adhesive that doesn’t come in contact with the images or documents, but you still want to make sure that the adhesive is reversible, colorless, odorless, solid and acid-free. Refrain from placing cutouts and stickers on your actual images or documents.
If you don’t like the idea of using photo corners you can buy a special paper punch that allows you to create slits in your pages to hold the photographs by their corners. This eliminates the need for special supplies and concerns about adhesives.
6. Plan ahead to add pages. A scrapbook tends to grow with your family, so plan ahead for expansion through the years. Capture those photographs of family milestones as they occur and collect small artifacts and memorabilia for later inclusion in the album.
This is a great opportunity to improve the photographic quality of your scrapbooks. Professional photographers suggest using close-up shots. They also recommend adding interest to your images by including props and selecting appropriate backgrounds. And don’t rely only on color photography. Add a few black-and-white images to the album by using Kodak’s new black-and-white film that can be processed at most color-processing stations. It will add a little variety to your heritage album. (For a prizewinning professional photographer’s tips on shooting family photos, see the October 2000 issue of Family Tree Magazine.)
7. Explore new technology. One way to create a safe scrapbook without making copies and buying supplies is to invest in a software package that does some of the work for you. For example, with American Greetings Scrapbooks & More you can create scrapbook pages to print out or post on the Web. You select the type of page and format from a list of projects, then digitally insert your photographs. It accepts images from photo disks, photo CD-ROMs, digital cameras, scanners and even those sent to you via the Internet. There’s also a photo organizer to keep track of your images and a photo editor to digitally enhance, crop or fix your pictures.
If you decide to print the pages you’ve created with scrapbook software rather than post them on a family site, don’t forget to use acid- and lignin-free paper. Be careful of the type of ink you use in your printer — make sure it’s not water-soluble.
8. Express yourself Explore the vast resources of the scrapbook market to discover new ways to tell the story of your family. Include memorabilia by using specially made polypropylene envelopes, available in a variety of sizes, that use the same adhesive as photo corners. Decorate your pages with stickers of acid-free paper and adhesive or use cutouts that follow safe scrapbook guidelines. As long as you don’t put your images in danger by exposing them to harmful substances and chemicals, be as creative as you can. Just don’t let your excitement cause you to make preservation mistakes.
Veteran scrapbook hobbyists talk about how intimidating a blank page can be or how they doubted their abilities to create beautiful albums. If you need ideas, look no further than two popular magazines, Creating Keepsakes and Memory Makers. Creating Keepsakes works with an advisory committee of preservationists to insure that products that receive their “CK OK” stamp of approval are really safe to use. Both magazines feature how-to articles and scrapbook pages submitted by readers. If you don’t know where to buy supplies or attend classes in your area, consult the directories in the back of every issue.
One of my favorite features in these magazines is when the editors take apart an old scrapbook page and redesign it using up-to-date materials. It’s time for me to follow their lead and transform my fading high school albums into safe scrapbooks that my family can enjoy.
From the December 2000 issue of Family Tree Magazine
ADVERTISEMENT


